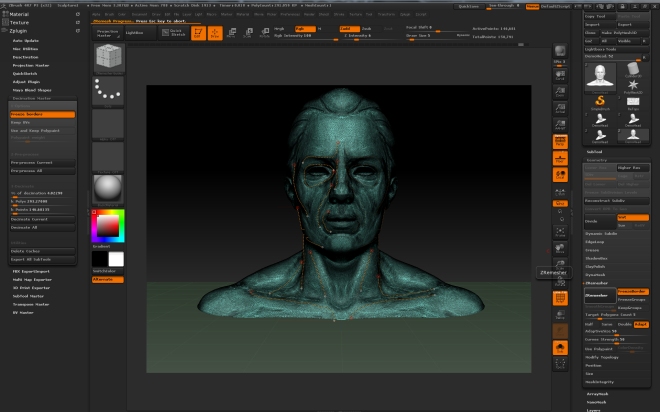
Today (Day 3) we looked at the retopology tools within ZBrush itself. While the workflow of going from Maya to Zbrush to Knald to Unreal is really good, and not as difficult as it sounds, it is possible to do all of the modelling and retopology and baking in ZBrush itself, even if it is a bit awkward. We learned this because it is very possible that the company we work for may not use Knald or xNormal, and may require you to use ZBrush alone.
There are so many tools in ZBrush for retopology. Decimation Master is a really powerful tool for reducing polygons, and reduced some of the meshes we tested from millions of polygons to thousands with very little change in silhouette.
zRemesher is a tool used for cleaning topology, and can reduce polygons while keeping all the important forms. N.B. “Adaptive” tries to keep the forms as much as possible. There is also a zRemesher Guide brush, to give importance to certain shapes of the sculpture.

UV Master is essential for creating UV sets within ZBrush, and uses a really clever and simple painting technique to give importance and weight to UVs.
Finally the Multi Map Exporter is the best way to export maps. It also has a Flip V option which is important, because ZBrush uses flipped V coordinates (for some reason!).
We also looked at zProject which is a way of projecting data to a low poly mesh from a high poly mesh.
I also went on to model and sculpt some of the assets for my scene.
Ceiling Fan: I used the Symmetry function a lot in this model, because a lot of the elements are replicated around the entire mesh. I then roughed it up a little with the Planar brush to are away the hardest edges and give it a slightly more aged look. I used the polish brush on the metal surfaces to warp the faces a little. I also used DynaMesh on some parts of the model. I did this so that I could introduce screws using the IMM brushes, and then remesh it so that it was incorporated into the mesh.
Table Jukebox: This was a really cool and interesting model to do. The shape was quite difficult to get right in maya. I used smooth mesh preview to get the shape right, which I then converted to polygons and used GoZ to import it into Zbrush. Here I added basic wear-and-tare, and I also sculpted detail like the coin slot on the top of the jukebox. I did this using a mask using an alpha that I created in Photoshop.
Booth Chair [unfinished]: Then I started modelling the booth in Maya, which I then brought into zBrush. I started to sculpt the detail in ZBrush. I created an alpha in photoshop in greyscale and 16bit to give as much grey depth as I could, for the internal vertical pleats in the booth. I don’t know are the edges as round as they should be so I may have to go back and adjust these. I then tried to add the seems around the leather cushions in zBrush using the CurveTubes brush, but the result wasn’t perfect. My hand wasn’t steady enough to get a perfect shape. I considered using LazyMouse to steady my hand, but I decided it was quicker to take a screenshot of the profile and create another mask in Photoshop and then inflate the edges using deformation in Zbrush. The result is ok, but a bit sharp, so I may go back and add the tubes like I planned. I also want to add some undulation and variation to the shape like I did the other assets.
Finally, I blocked out my scene in Unreal Engine for the first time. I ended up resizing the bar counter a little because there was too much empty floor space in the scene. It looks a bit better now, but may need some more work.
[insert image of blackout in unreal]
Summary:
Day 3 we looked at retopology in Zbrush, using various techniques, and basically learned how we can use only Zbrush to create our models. I also modelled and sculpted a few of my objects in Maya and Zbrush. Finally, I blocked out my scene in Unreal for the first time.


