Broken Collarbone!

The past few weeks have been very quiet  due to a broken collarbone. It’s healing quickly though, so I hope to be back to my old nonesense soon.

In the meantime though, I have the pleasure and embarassement of showing that I was fearured in Develop and MCV’s magazine, as a “rising star”. Major thank you to Escape Studios for putting me forward for this, my mother is very proud!

risingstar

Broken Collarbone!

Ceiling Decoration

With the first floor almost complete, I have started to work on the ground floor of the chapel. The ground floor is filled with a load of ornate decorations, so this will probably be the most time consuming part of the project.

Below is my first attempt at creating the ceiling decoration. There are definitely a few problems with it – The dome doesn’t have the same level of high frequency noise as the rest of the decoration, and looks a little dull. The AO is also particularly strong, making the repetition look a lot more noticable.

I will review these assets going forward, but at least I know the approach will work.

CeilingDecoration_01CeilingDecoration_02CeilingDecoration_03CeilingDecoration_04

Ceiling Decoration

Painted Ceiling

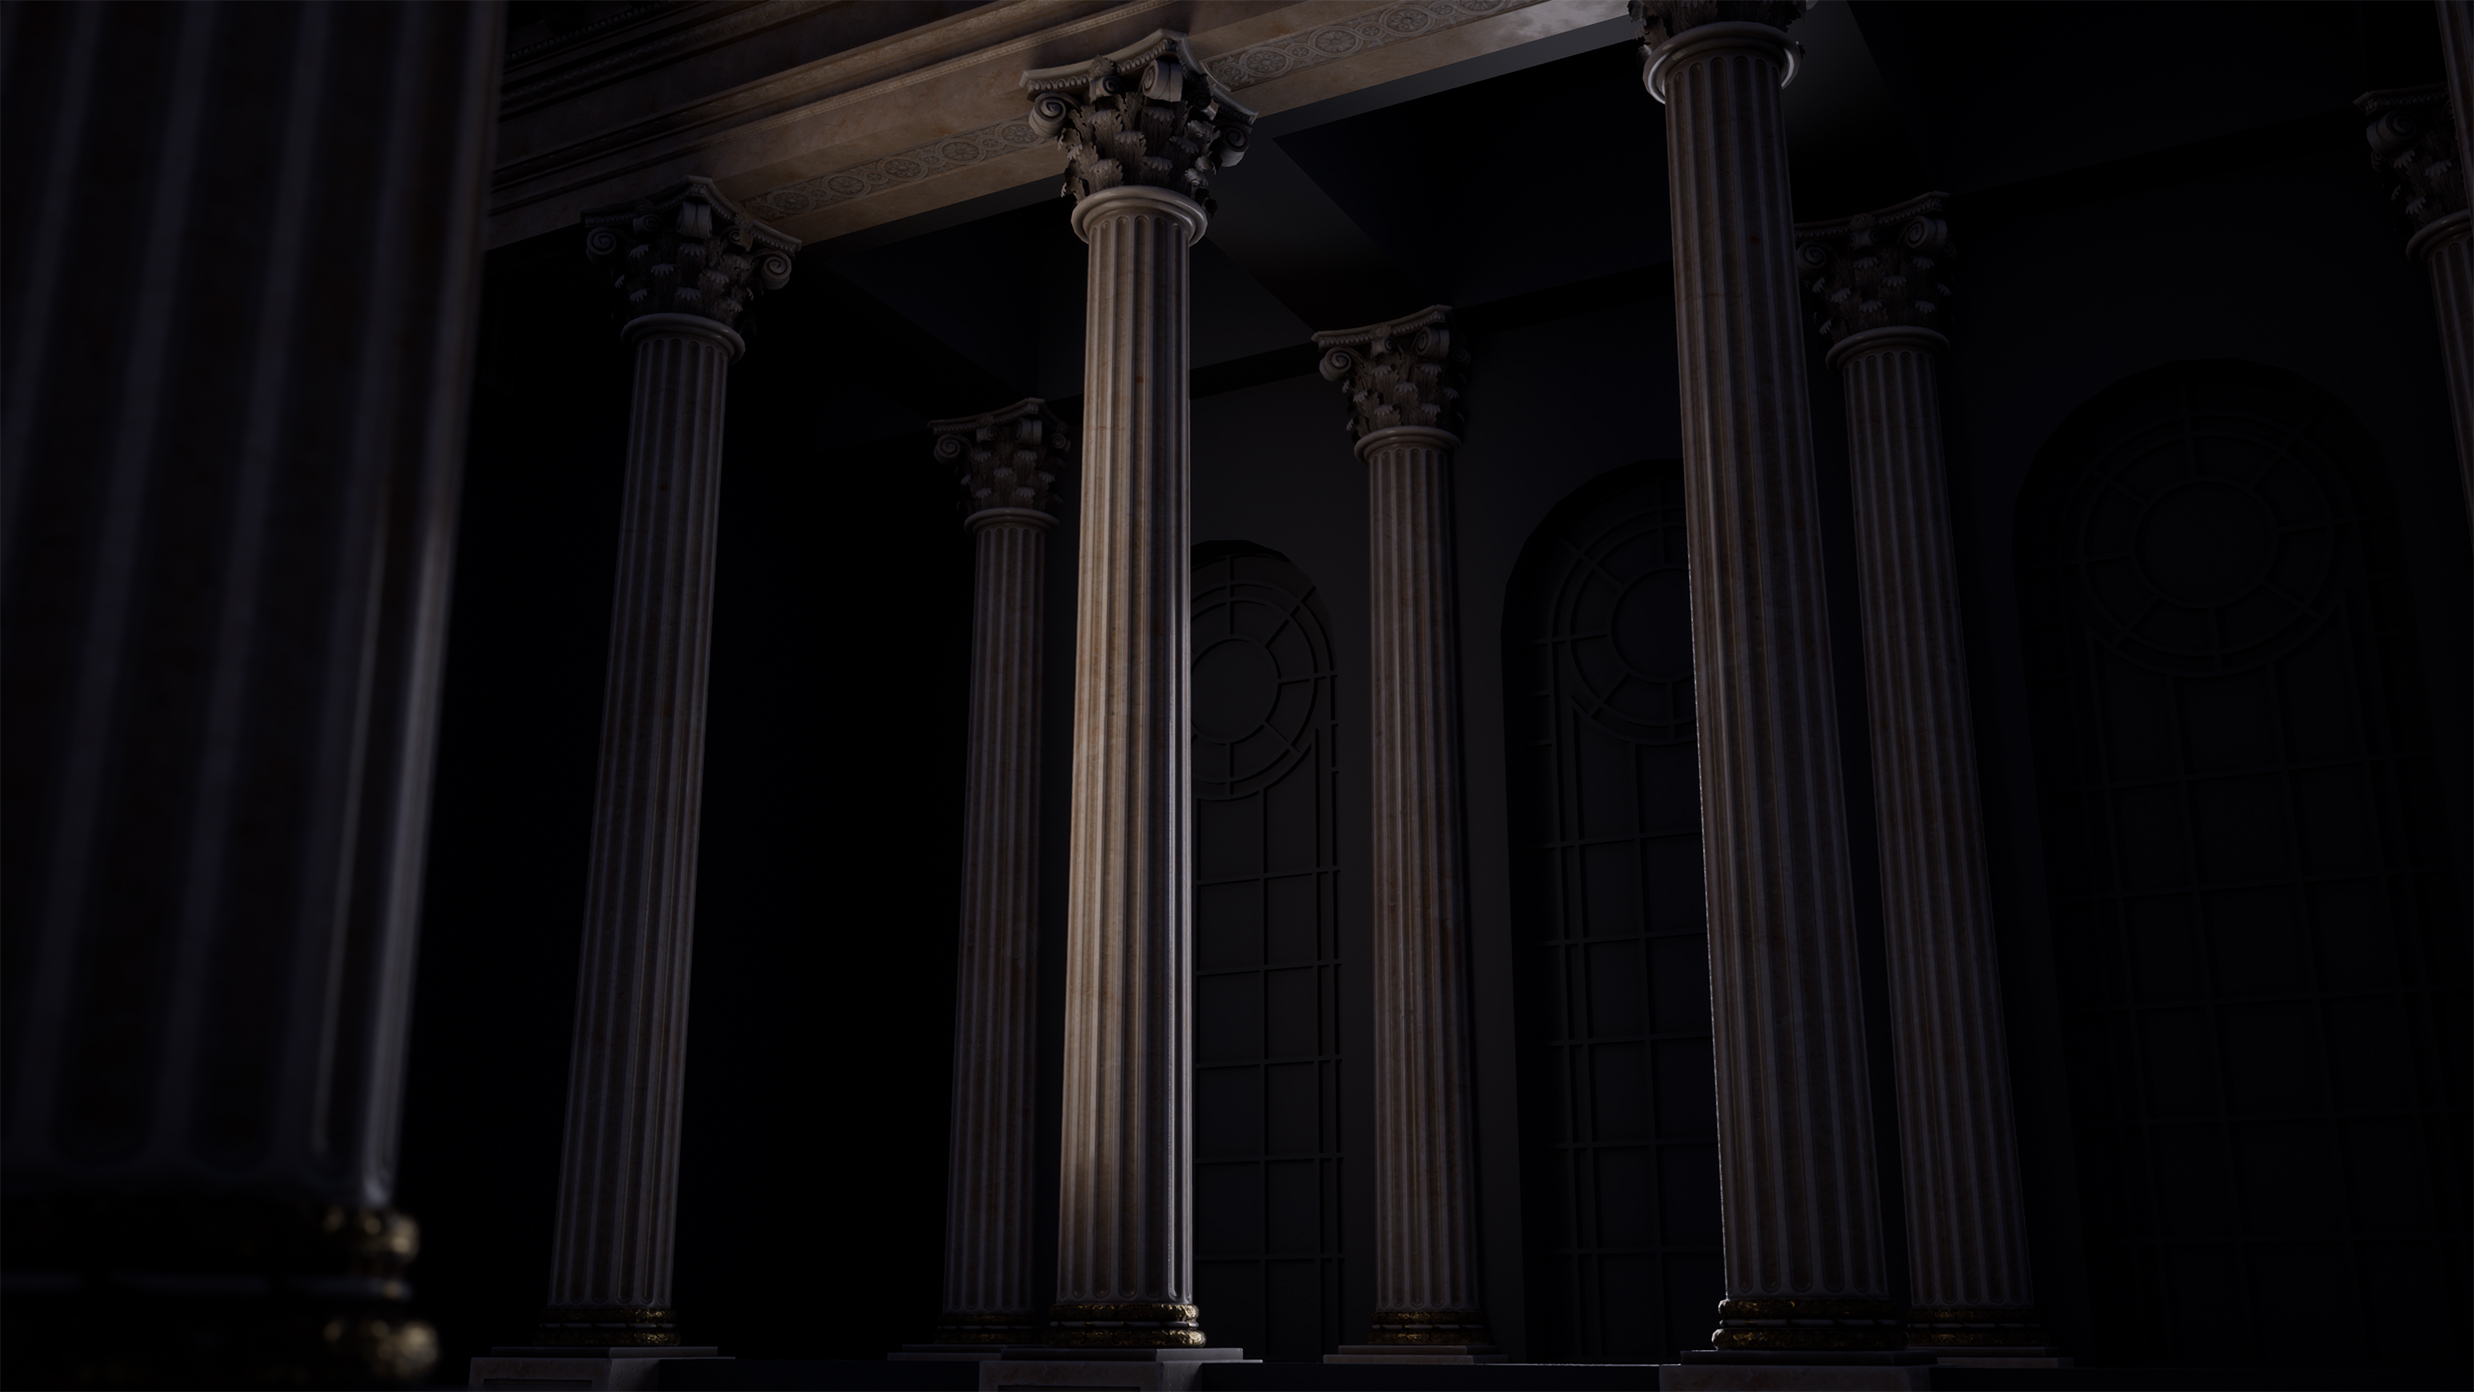
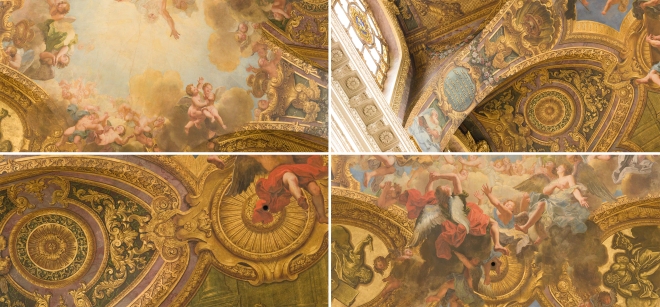
The ceiling of the chapel is a really intricate painting. I was originally going to make a modular piece, but when I explored it it looked really repetative. And since the ceiling is in view at all times, I really wanted to put some emphasis on it.

test_ip

My original approach was to find images of the ceiling online and project them to create a texture. This kind of worked, but getting it seamless was really difficult. So instead I decided to do the following.

I first started by acumulating as many images as I could, from every possible angle, in as high a resolution as possible.
images
I then used Photoshop’s Photomerge algorithm to stitch the images together. I had too many images to merge in one go, so merged them seperately, and then merged them together fully after.

I then skewed this so it was as square as possible. I created a massive texture (16k x 18k) to ensure I would have as high a resolution as possible while working with it. I then created a high resolution version of the ceiling in Maya, and UVed the high poly to match this new texture, trying to match the intricacies as much as possible.
high

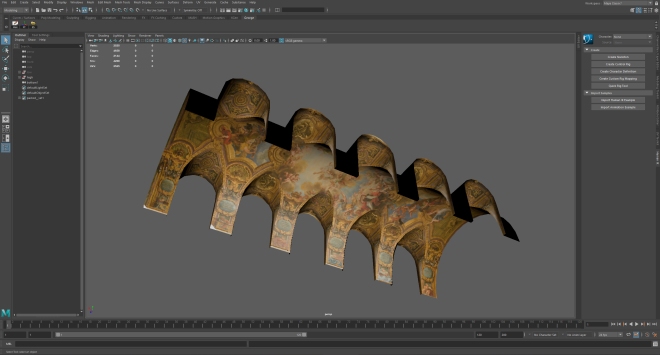
I then created a low poly, in game version of the mesh, splitting it into three materials and baked the diffuse from the above high onto the in game mesh. I then brought these meshes into Substance Painter where I projected any pieces of the texture that didnt mesh together nicely, and added some paint normal information.


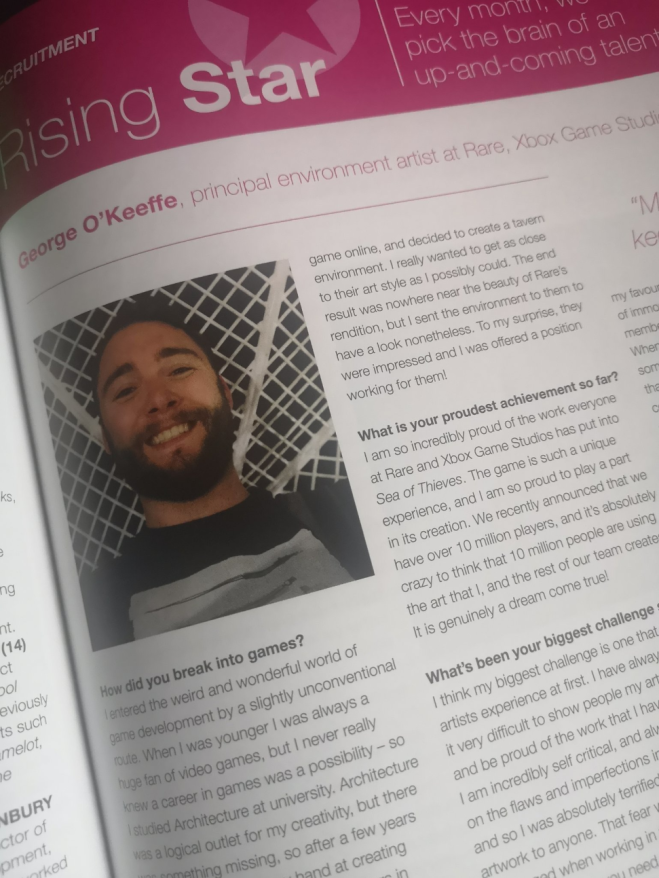
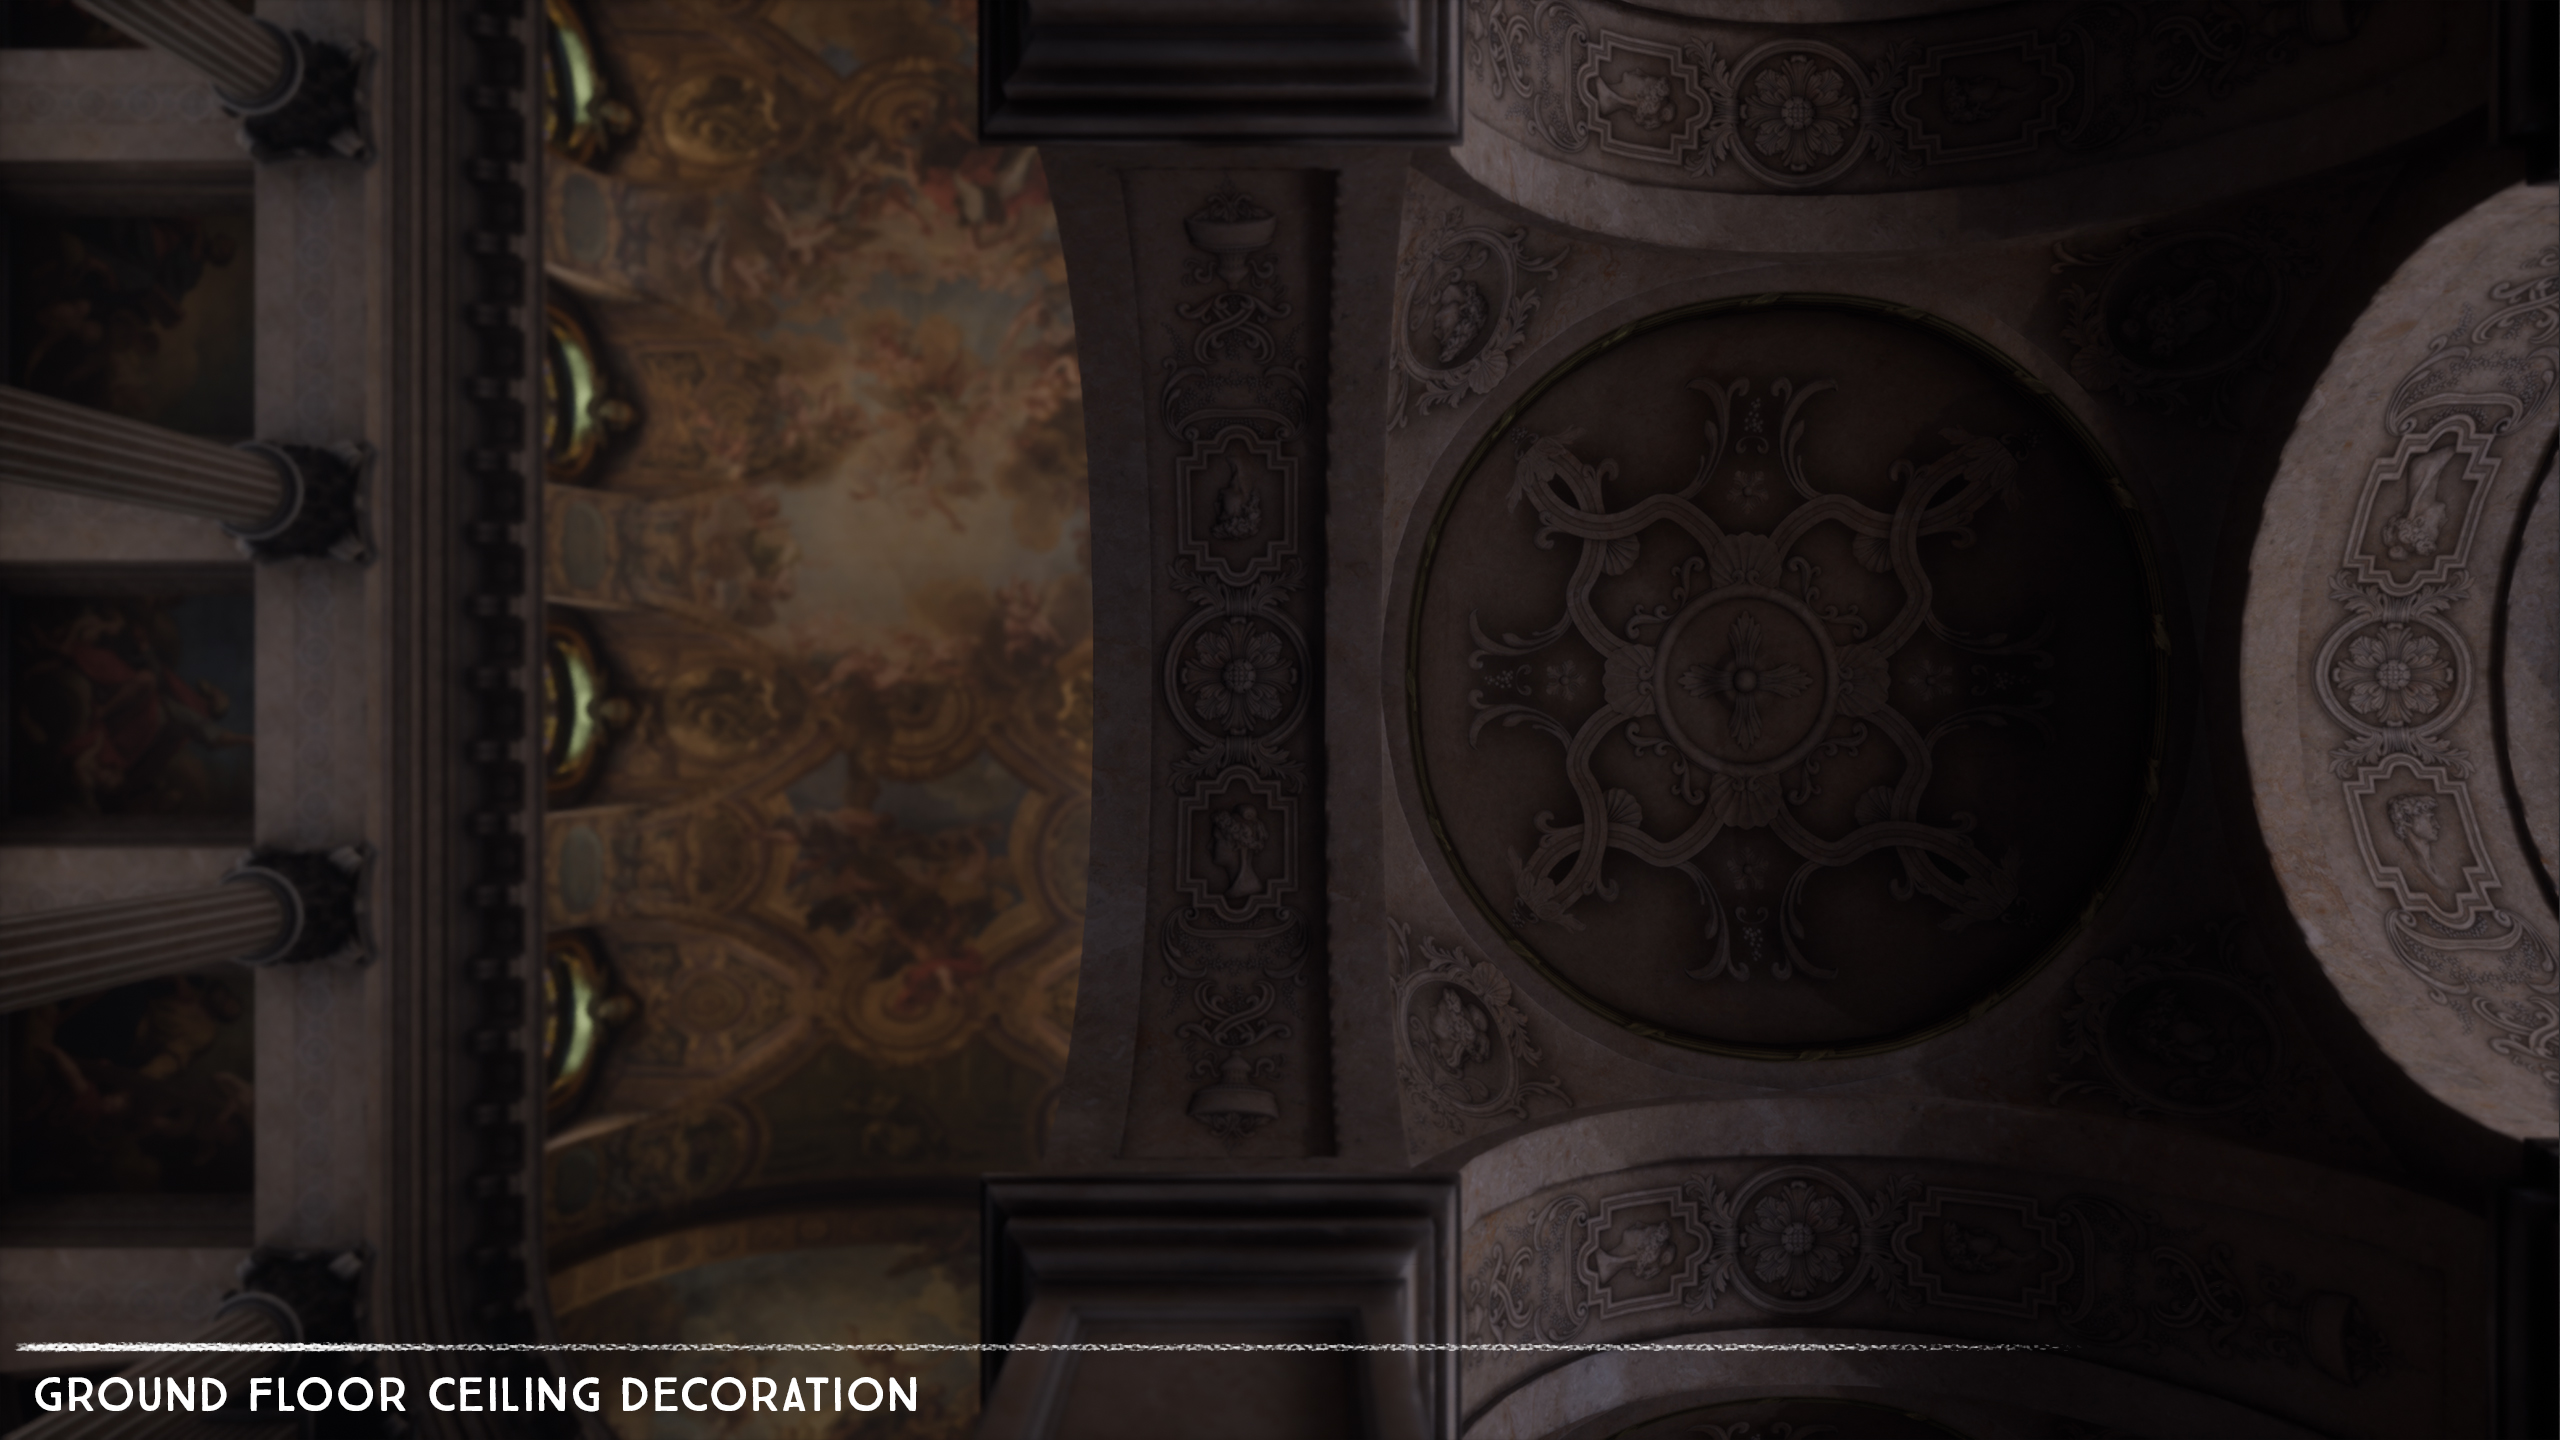
This is the result in engine:


I then created a new version of the windows to fit the ceiling.

Painted Ceiling

First Lighting Pass

The first floor of the chapel is coming together. I have decided to complete as much of this floor as possible, and test some lighting to experiment with mood. This will likely change before the finished enviornment but I think it’s worth testing out.


Handrail:


Floor:
Because the floor is quite large, I decided to build a few modules of tiles that I thought could make up the entire floor while keeping the texture resolution high. It involved a lot of deforming and squishing, so texel density isnt 100% perfect, but I think I get away with it in most areas.


Assembly and first lighting pass:
This is a really early lighting pass in an attempt to get some mood into the environment. This will likely change a lot, but I thought it was worth getting some basic lighting in now. I decided to replace the transparent window material with emissive to give a smokey ambient light around the windows. Again, very early stages and it may change, but emissive allowed me to get the atmosphere I wanted, and saved me having to model an exterior!

First Lighting Pass

Corner Decals

With this scene I really want every single asset to feel sculpted, and for every single piece of the scene to get the love and attention it deserves. The obvious approach for achieving this would be to model and sculpt every single asset individually. This looks great, but is obviously quite time consuming, and needlessly expensive in engine. Thus, as a result, I decided to create a series of tiling corner decals, which can be placed on top of meshes to give the illusion of sculpting. This is not only more efficient, but it also gives a very convincing result.

I first saw this technique implemented by Leonardo Iezzi on Artstation: https://www.artstation.com/artwork/l3wwa

I started by sculpting a few corner decals in ZBrush. I wanted these details to be relatively subtle, as the chapelle is not very damaged, but I still wanted to get the hand sculpted feel.
Corner_decals_01

I then baked these high poly meshes onto flat corners with a soft edge in Substance Painter and textured them.

I then brought these details into Unreal to test them. Originally, I created the alpha chanel as a soft gradient, hoping the textures would blend nicely. While the results werent horrific, it was very obvious they were not the same mesh. So I decided to go for a much harder alpha, with masks the transition until the damage occurs.


The result works pretty well so far. I will definitely need to refine it a little, but I think the effect works pretty convincingly, as you can see from the below before and after image


Corner Decals

Relief Sculptures

The base of the columns has space for relief sculptures. Originally I intended on doing 4 sculpts, but for the meantime I decided two was enough. Rarely will you see more than one on screen at a time, so I don’t see the need to create too many, especially when they are quite time consuming to model. This may change in the final scene, but two will do for now!

Relief_sculpt_00

Relief_00Relief_01Relief_02Relief_03

Relief Sculptures

Column In Engine

After a lot of deliberation and baking around 100 times, I decided to bake the capital of the column to alpha. While this looks a little flat, it allows me to have a much more interesting shape capital without thousands of polys. I am not 100% happy with the result, but when you view it in context I think it will look just fine.

I quickly applied a marble material in Substance Painter, but I intend on doing a full pass of all the marble materials at the end, to ensure consistency. As this scene is predominantly made of marble I think it is important for there to be a consistancy between them.

columncolumn_02column_03column_04column_05

Column In Engine